
Sending Messages to Imported Lists using NetCommunity
Published
One of the questions most frequently asked by our clients is how to use the imported email list function in NetCommunity, todays guide is going to cover this functionality with a step by step guide to walk you through this.
The first step is to create a CSV file that will be used for the import; you can do this manually using a spreadsheet program like Excel or alternately generate one from the Raisers Edge using the export to CSV function to extract a query’s output in this format.
However you choose to do this, the CSV file used will need to devote its top row to column headers. See the screenshot below for an example of this. Note that the headers must not contain any spacing, although you can use underscores instead, as with the Email_Address in the below example.

You will need to include a Name column and an Email address column, these are used by NetCommunity when importing the list. These two fields, along with any additional fields you might add, i.e. the Job field in the example above, will be available for use as merge fields when designing the email, since imported lists do not directly draw from the Raisers Edge. Unlike composing emails using a constituent data source these are the only merge fields you will be able to use.
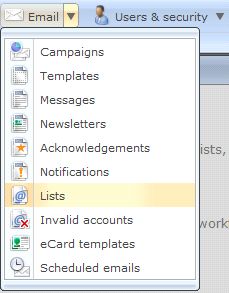
Once you have created your CSV file you will need to upload the CSV to a list. To do this expand the email section in NetCommunity and select Lists from the menu.
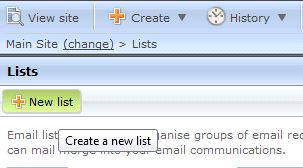
Next Click on the New List button at the top left of the screen.
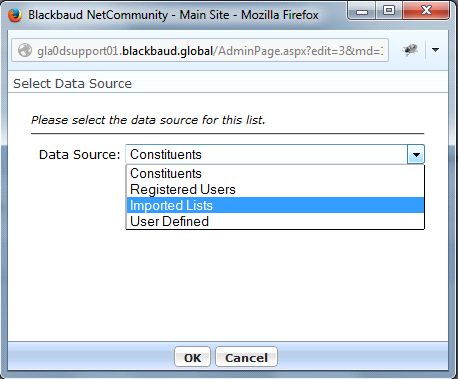
A popup window will appear. From this select the Imported Lists option from the Data Source drop down and click OK.
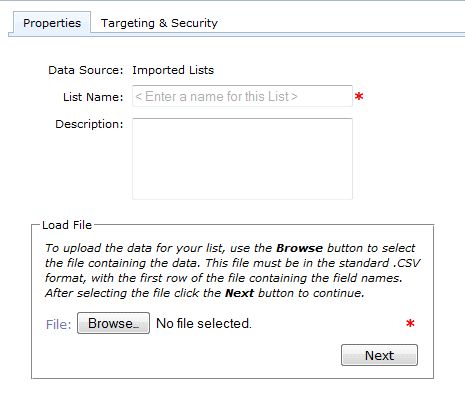
You will now see the list creation screen. In the box provided enter a name to identify the list by, and optionally a description. You will see a Load File box below, clicking the browse button in this box will present you with a window allowing you to browse for the imported list file you created/exported earlier. Browse to where you stored this, select it and click OK. Once you have done this click the Next button.
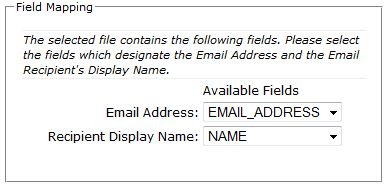
Once this has been done, you will see a new panel asking you to specify which fields in your CSV contain the email address and name of the constituent. Set these appropriately, as with the example below.
Click save at the top of the screen. You have now generated the list you are going to send your message to. Now we will move on to generating the message and using the list itself.
Every message sent using an imported list needs to be built from a template which uses the list you are sending to as its data source. To generate an appropriate template for your message, first browse to the Email section in the top menu bar, then click on Templates.
Here you will see the option to create a new template in the top left. Click on this now and you will be presented with the following page:
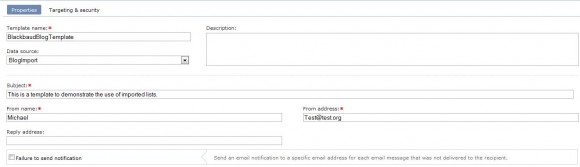
From here you will need to fill in the various fields presented to you. The most important thing at this stage is the Data Source drop down. If you expand this you will see that the list we created in earlier steps is listed here by the name you gave it. You must select the appropriate imported list from this dropdown.
Once you have filled out the fields and set your data source click the green Save button, this will take you to the standard email design window.
Once you are here you can customize your template as you would for any other template.
Once you are finished with the template design, click save and browse from the top menu to Email > Messages, then click the New Message button.
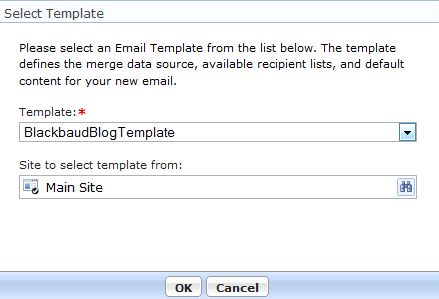
When you are asked to select the template, select the template you just created and click OK.
From here you will be sent to the standard message designer window. Notice under Recipient Lists that the list you created has automatically been added to receive the message.
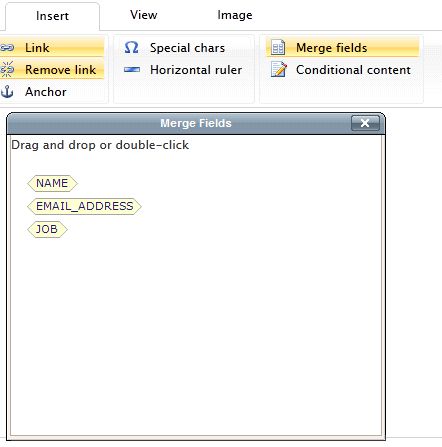
The final things to note are that any columns in your CSV file can be used as merge fields for this message and that the usual merge fields available in a constituent based email will not be available as the message will not be interacting with Raisers Edge to pull that data. See the example below where the Name, Email Address and Job columns shown earlier in my example CSV are being pulled into the message, with the appropriate value for each row being pulled into the final message for each user:
This concludes the tutorial on imported lists. Hopefully you now have a better idea of how to use this function within the NetCommunity software. For further detail please refer to our how NetCommunity Email guide located at https://www.blackbaud.com/files/support/guides/bbnc/emailre.pdf.
The first step is to create a CSV file that will be used for the import; you can do this manually using a spreadsheet program like Excel or alternately generate one from the Raisers Edge using the export to CSV function to extract a query’s output in this format.
However you choose to do this, the CSV file used will need to devote its top row to column headers. See the screenshot below for an example of this. Note that the headers must not contain any spacing, although you can use underscores instead, as with the Email_Address in the below example.
You will need to include a Name column and an Email address column, these are used by NetCommunity when importing the list. These two fields, along with any additional fields you might add, i.e. the Job field in the example above, will be available for use as merge fields when designing the email, since imported lists do not directly draw from the Raisers Edge. Unlike composing emails using a constituent data source these are the only merge fields you will be able to use.
Once you have created your CSV file you will need to upload the CSV to a list. To do this expand the email section in NetCommunity and select Lists from the menu.
Next Click on the New List button at the top left of the screen.
A popup window will appear. From this select the Imported Lists option from the Data Source drop down and click OK.
You will now see the list creation screen. In the box provided enter a name to identify the list by, and optionally a description. You will see a Load File box below, clicking the browse button in this box will present you with a window allowing you to browse for the imported list file you created/exported earlier. Browse to where you stored this, select it and click OK. Once you have done this click the Next button.
Once this has been done, you will see a new panel asking you to specify which fields in your CSV contain the email address and name of the constituent. Set these appropriately, as with the example below.
Click save at the top of the screen. You have now generated the list you are going to send your message to. Now we will move on to generating the message and using the list itself.
Every message sent using an imported list needs to be built from a template which uses the list you are sending to as its data source. To generate an appropriate template for your message, first browse to the Email section in the top menu bar, then click on Templates.
Here you will see the option to create a new template in the top left. Click on this now and you will be presented with the following page:
From here you will need to fill in the various fields presented to you. The most important thing at this stage is the Data Source drop down. If you expand this you will see that the list we created in earlier steps is listed here by the name you gave it. You must select the appropriate imported list from this dropdown.
Once you have filled out the fields and set your data source click the green Save button, this will take you to the standard email design window.
Once you are here you can customize your template as you would for any other template.
Once you are finished with the template design, click save and browse from the top menu to Email > Messages, then click the New Message button.
When you are asked to select the template, select the template you just created and click OK.
From here you will be sent to the standard message designer window. Notice under Recipient Lists that the list you created has automatically been added to receive the message.
The final things to note are that any columns in your CSV file can be used as merge fields for this message and that the usual merge fields available in a constituent based email will not be available as the message will not be interacting with Raisers Edge to pull that data. See the example below where the Name, Email Address and Job columns shown earlier in my example CSV are being pulled into the message, with the appropriate value for each row being pulled into the final message for each user:
This concludes the tutorial on imported lists. Hopefully you now have a better idea of how to use this function within the NetCommunity software. For further detail please refer to our how NetCommunity Email guide located at https://www.blackbaud.com/files/support/guides/bbnc/emailre.pdf.
News
Raiser's Edge® Blog
12/10/2014 6:00am EST
Leave a Comment