
Expert Export Tips
Published
When you’re looking to pull information cleanly in Altru, nothing beats a good export! Not only do you get one row per record, but by using an export definition, you have much more control about what information you display. This blog post will discuss some helpful exporting tips to help you utilize export (and your data!) to its fullest. Whether you are an export pro, or only just starting to experiment with it, I know these tips will be helpful!
Before we get started—there are a few important things to know about exporting data with an Export Definition.
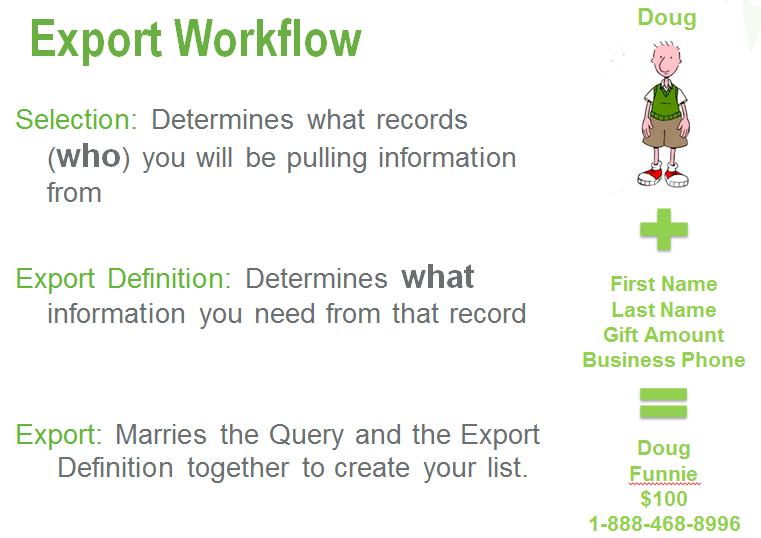
Export starts with a selection of people, sales orders, revenue, etc. that you’d like to pull information from. The export definition then determines what information you’d like from those records. The export process then pairs the two together and pulls the information specified in the export definitions from the records in your selection:
Here’s an image to illustrate:
 One very important thing to note is that the Export Definition and the filters in your selection are completely unrelated!
For example, in query, if you were to add “Constituency is equal to Staff” in Include Records Where, then output the Constituency field in Results fields to display, you will only see Staff, even if that constituent has other constituencies on the record. In Export, your export process is only seeing you need information from that record—the export definition then determines what information you need.
Now that we’ve got the basics nailed down, let’s get to the good stuff! Here are some expert export tips that will help you to make pull the perfect list!
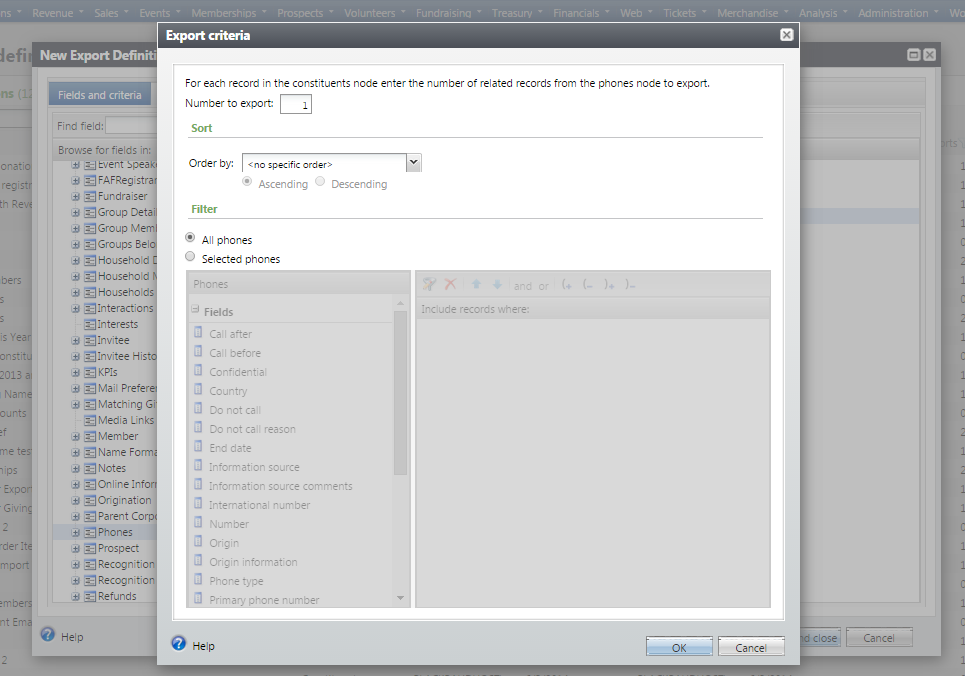
In the World of Altru, I really do consider Export Criteria to be my best friend. This gives us the option to see exactly what we want to see from the results—and that is a beautiful thing:
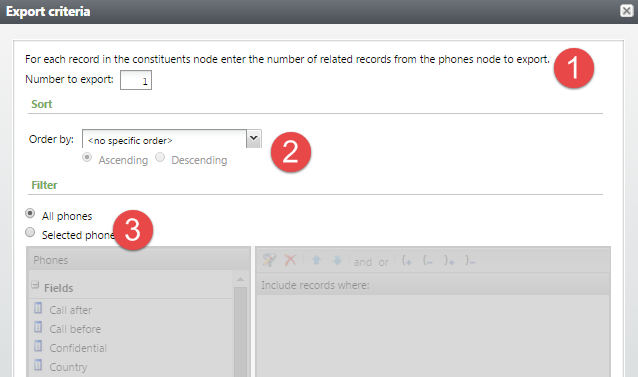
 Let’s break it down using phone number as an example—this screen is basically asking us three questions:
 If we want to see 5 phones, we change the Number to export to be 5:
 Let’s say, we want to see the most recently added. We will change the Order by field to sort by Date Added (Descending will give us newest to oldest):
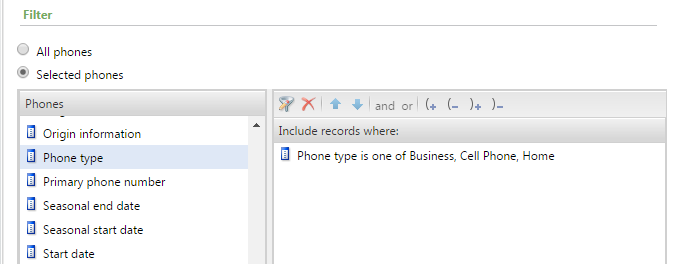
 And we only want to see Business, Home Phones, or Cell Phones. Instead of exporting all phones, we can choose to only output selected phones and use the fields from the left. In this instance, we’ll use “Phone Type” and output only those phone types we are looking for:
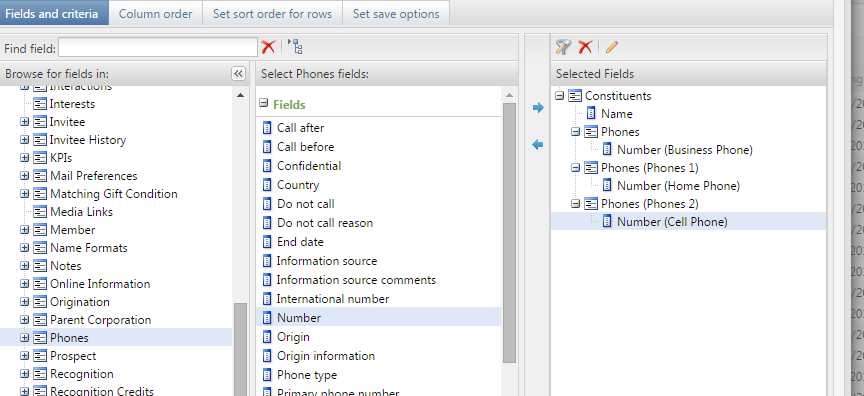
Now don’t stop here—you can output multiple nodes with different export criteria to get separate columns for different types of data.
Using Phones as our example, let’s say we wanted Business Phone, Cell Phone, and Home Phone in separate columns. We can actually add multiple nodes with different criteria to accomplish this:
 To add another node, all you have to do is click the top record in Selected Fields and re-add your field. A new Export Criteria window will pop up and you will be able to add new criteria. Here’s a short no sound video to illustrate.
This comes in extra handy with Sales Orders or Group Reservations. Often times, I want separate columns for different Price Types that may exist on Orders.
Because Export Definitions exist separately from an export process, you can reuse Export Definitions with different selections and different export processes.
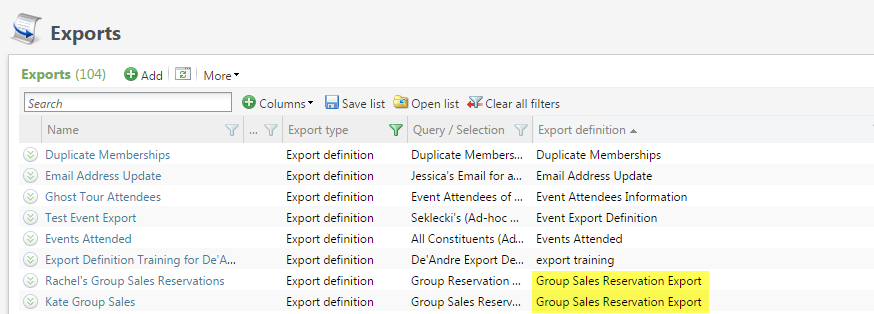 Does your Executive Director always ask for the same set of information about different groups of people? You can set up one export definition and use it in multiple export processes!
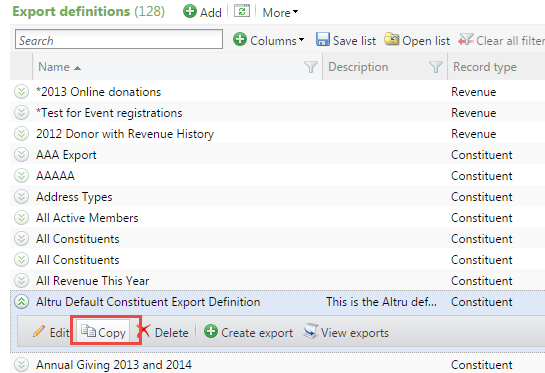
You can also use an existing Export Definition as a starting point for a new one. It’s just a quick Copy away!
Although this tip isn’t really directly related to exporting a list, I couldn’t resist sharing! We’ve recently added a great new feature that enables you to “Write a Letter from a Template.” This allows you to merge a letter directly from the constituent record. The best part is that you can use a standard header file OR you can build your own export definition to include whatever merge fields you’d like!
You could use this for standard letters or documents you frequently send to your constituents. For example:
...and more!
Here’s how:
For detailed steps, be sure to view our videos:
In case you missed it, you can also find the recording and notes from our Masters Workshop about Exporting Data on the new Altru Training page.
Before we get started—there are a few important things to know about exporting data with an Export Definition.
Export starts with a selection of people, sales orders, revenue, etc. that you’d like to pull information from. The export definition then determines what information you’d like from those records. The export process then pairs the two together and pulls the information specified in the export definitions from the records in your selection:
Here’s an image to illustrate:
One very important thing to note is that the Export Definition and the filters in your selection are completely unrelated!For example, in query, if you were to add “Constituency is equal to Staff” in Include Records Where, then output the Constituency field in Results fields to display, you will only see Staff, even if that constituent has other constituencies on the record. In Export, your export process is only seeing you need information from that record—the export definition then determines what information you need.
Now that we’ve got the basics nailed down, let’s get to the good stuff! Here are some expert export tips that will help you to make pull the perfect list!
Tip #1: Export Criteria is your BFF
In the World of Altru, I really do consider Export Criteria to be my best friend. This gives us the option to see exactly what we want to see from the results—and that is a beautiful thing:
Let’s break it down using phone number as an example—this screen is basically asking us three questions:- How many would you like to export?
- Which do you want to appear first?
- What types would you like to see?
If we want to see 5 phones, we change the Number to export to be 5:Let’s say, we want to see the most recently added. We will change the Order by field to sort by Date Added (Descending will give us newest to oldest):And we only want to see Business, Home Phones, or Cell Phones. Instead of exporting all phones, we can choose to only output selected phones and use the fields from the left. In this instance, we’ll use “Phone Type” and output only those phone types we are looking for:Tip #2: Use Multiple Nodes
Now don’t stop here—you can output multiple nodes with different export criteria to get separate columns for different types of data.
Using Phones as our example, let’s say we wanted Business Phone, Cell Phone, and Home Phone in separate columns. We can actually add multiple nodes with different criteria to accomplish this:
To add another node, all you have to do is click the top record in Selected Fields and re-add your field. A new Export Criteria window will pop up and you will be able to add new criteria. Here’s a short no sound video to illustrate.This comes in extra handy with Sales Orders or Group Reservations. Often times, I want separate columns for different Price Types that may exist on Orders.
Tip 3: Recycle Export Definitions
Because Export Definitions exist separately from an export process, you can reuse Export Definitions with different selections and different export processes.
Does your Executive Director always ask for the same set of information about different groups of people? You can set up one export definition and use it in multiple export processes!You can also use an existing Export Definition as a starting point for a new one. It’s just a quick Copy away!
Tip 4: Write a Letter
Although this tip isn’t really directly related to exporting a list, I couldn’t resist sharing! We’ve recently added a great new feature that enables you to “Write a Letter from a Template.” This allows you to merge a letter directly from the constituent record. The best part is that you can use a standard header file OR you can build your own export definition to include whatever merge fields you’d like!
You could use this for standard letters or documents you frequently send to your constituents. For example:
- Fundraising Solicitation Letters
- Fundraising Stewardship Letters
- Planned Giving Letters
- Birthday Letters
- Annual Statements
- Group Sales Invoices
...and more!
Here’s how:
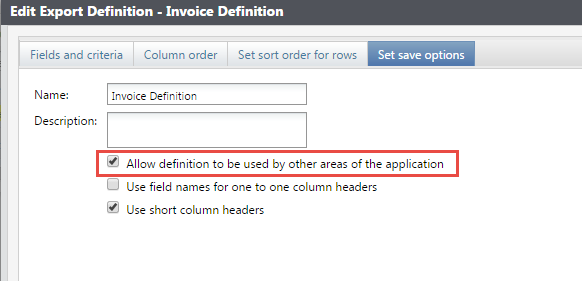
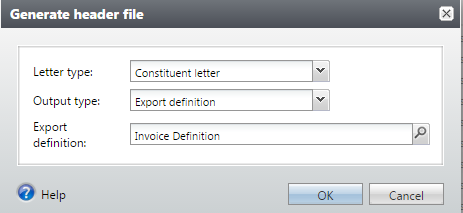
- Go to Administration > Export Definitions and build a Constituent Export Definition with information you need for your letter template. Be sure to mark the option when saving your export definition to allow other areas to use it!
- Go to Marketing and Communications > Letter Template Library and generate a Header file to use to create your letter template:
- Use a Mail Merge in Microsoft Word to insert the Altru merge fields into your letter template.
- Upload the merged Word template to the Letter Template Library as a constituent letter.
For detailed steps, be sure to view our videos:
- Using Write a Letter Tools in Altru Constituent Records
- Creating Template Letters using a Header File in Altru
In case you missed it, you can also find the recording and notes from our Masters Workshop about Exporting Data on the new Altru Training page.
News
ARCHIVED | Blackbaud Altru® Tips and Tricks
07/16/2015 8:02am EDT
Leave a Comment