
Deleting Advance Deposits in Student Billing – The RIGHT Way!
Published
Advance deposit season is upon us and payments from parents are coming into your school left and right to ensure that their children are guaranteed a spot at your school for the next year. You might think that you have the whole advance deposit thing down pat, but what about refunding or deleting them from student records? Depending on the situation, it could be as easy as 1-2-3, but assuming that you know all there is to know about this process could get you into quite the General Ledger-shaped pickle.
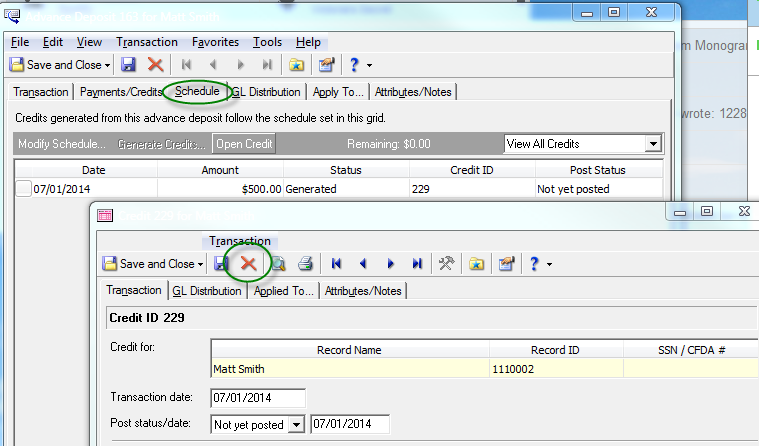
First thing’s first, you will need to delete any credits that were generated from the advance deposit that you want to delete.
In order to delete all of the credits that might have been generated, simply open the advance deposit, click on the Schedule tab, open the generated credit(s), and click Delete.
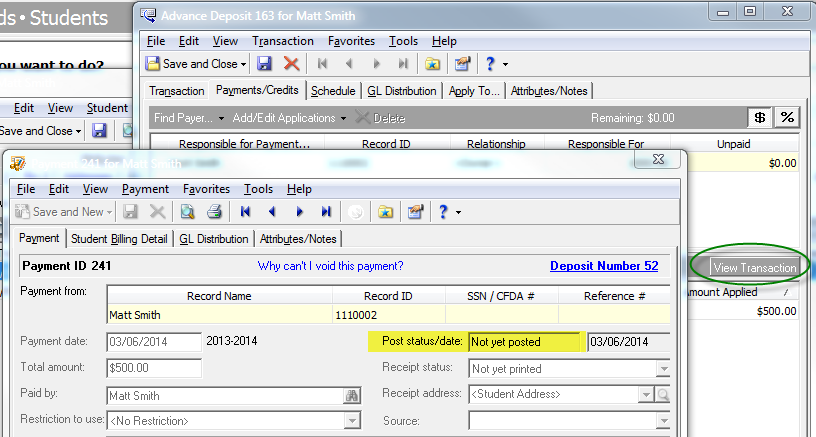
Once the credits have been deleted, you must first ask the age-old question: does the payment that is funding this advance deposit have a post status of Posted or Not Yet Posted? If you’re not sure, you can find this out by opening the advance deposit, clicking the Payments/Credits tab, highlighting the payment that is applied to the advance deposit and clicking View Transaction. The post status will show at the top right of the payment.
If the payment is Not Yet Posted, all you will need to do in order to delete the advance deposit is to open it and click the Delete button.
If the payment is Posted, then you will have to do the following things in this exact order in order to properly delete the advance deposit:
1. Unapply the payment(s) from the advance deposit.
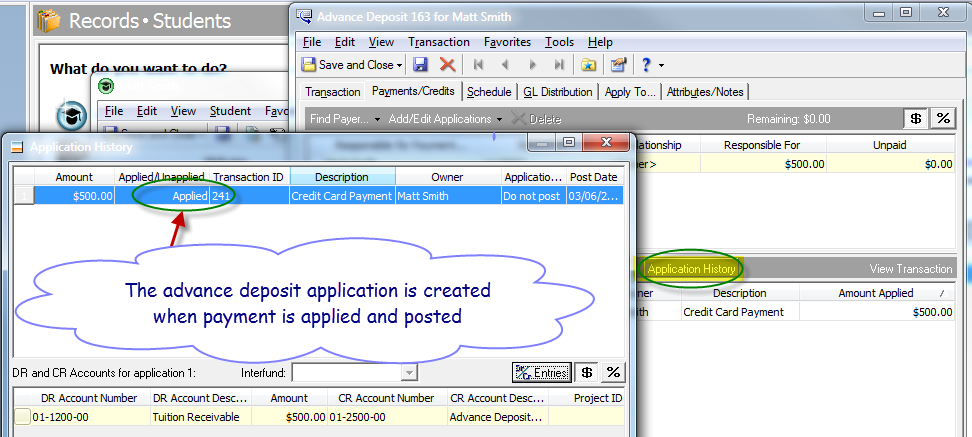
2. Post the advance deposit application that is created after unapplying the payment. Here is an example of what an advance deposit looks like before and after a posted payment is unapplied. This is found when you open the advance deposit, clicking the Payments/Credits tab, and clicking the Application History button:
Before: (note how the application is debiting the AR summary account and crediting the liability (or deferred) account)
After: (note how the unapplication is now debiting the liability account and crediting the AR Summary account)
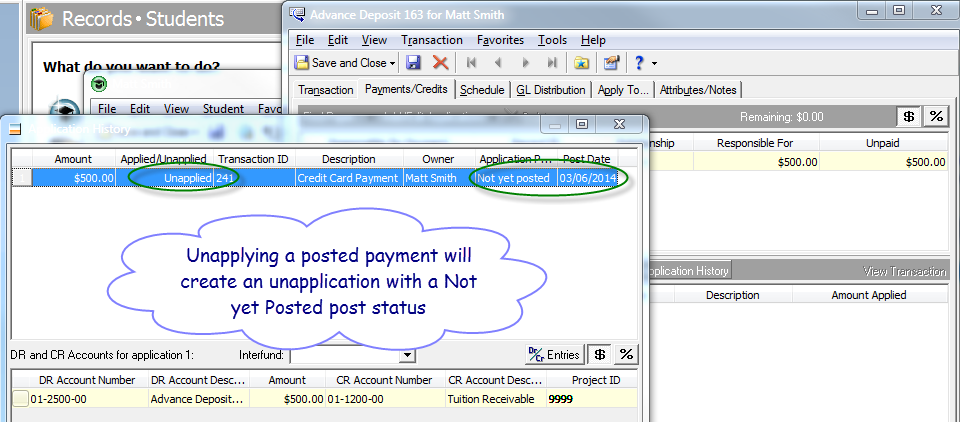
Once the payment is unapplied from the advance deposit, the unapplication will need to be posted to the GL. You can view the unapplication’s post status and post date in the Application History screen as seen in the above image. This is done in Student Billing in Administration > Post.
Once the unapplication has successfully posted to the GL, this takes the advance deposit money out of the deferred account and back into the AR Summary account, which is exactly what needs to happen. Here’s the kicker: if you delete the advance deposit before posting the unapplication to the GL to zero out the liability account, your unapplication will forever remain with a post status of Not Yet Posted, and the money will never move out of the liability account. This causes issues if you later want to try and reconcile your Advance Deposit report with your liability account in the General Ledger.
If you find yourself in this situation and need this fixed, we are here to help! Simply call Student Billing support, or create a case on Case Central and tell us what is going on.
3. Last but not least, delete the advance deposit, and void the payment if necessary.
First thing’s first, you will need to delete any credits that were generated from the advance deposit that you want to delete.
In order to delete all of the credits that might have been generated, simply open the advance deposit, click on the Schedule tab, open the generated credit(s), and click Delete.
Once the credits have been deleted, you must first ask the age-old question: does the payment that is funding this advance deposit have a post status of Posted or Not Yet Posted? If you’re not sure, you can find this out by opening the advance deposit, clicking the Payments/Credits tab, highlighting the payment that is applied to the advance deposit and clicking View Transaction. The post status will show at the top right of the payment.
If the payment is Not Yet Posted, all you will need to do in order to delete the advance deposit is to open it and click the Delete button.
If the payment is Posted, then you will have to do the following things in this exact order in order to properly delete the advance deposit:
1. Unapply the payment(s) from the advance deposit.
2. Post the advance deposit application that is created after unapplying the payment. Here is an example of what an advance deposit looks like before and after a posted payment is unapplied. This is found when you open the advance deposit, clicking the Payments/Credits tab, and clicking the Application History button:
Before: (note how the application is debiting the AR summary account and crediting the liability (or deferred) account)
After: (note how the unapplication is now debiting the liability account and crediting the AR Summary account)
Once the payment is unapplied from the advance deposit, the unapplication will need to be posted to the GL. You can view the unapplication’s post status and post date in the Application History screen as seen in the above image. This is done in Student Billing in Administration > Post.
Once the unapplication has successfully posted to the GL, this takes the advance deposit money out of the deferred account and back into the AR Summary account, which is exactly what needs to happen. Here’s the kicker: if you delete the advance deposit before posting the unapplication to the GL to zero out the liability account, your unapplication will forever remain with a post status of Not Yet Posted, and the money will never move out of the liability account. This causes issues if you later want to try and reconcile your Advance Deposit report with your liability account in the General Ledger.
If you find yourself in this situation and need this fixed, we are here to help! Simply call Student Billing support, or create a case on Case Central and tell us what is going on.
3. Last but not least, delete the advance deposit, and void the payment if necessary.
News
Blackbaud K-12 Solutions™ Blog
02/25/2015 6:30am EST
Leave a Comment