Assignments vs Assessments: When to Use Them
Published
Blackbaud's Academics product offers educators plenty of ways to create new work for students. However, it may not always be clear which option is best suited to accomplish what you need. Let's talk about Assignments versus Assessments.
Recently, we’ve been seeing an uptick of questions surrounding creating work in our Learning Management System within Academics. Schools were hoping to get their instructors up to speed on some of the more common tasks like creating a quiz or exam.
Today’s blog is all about this process and providing a high-level look at creating these items.
Let’s Create Some School Work!
The Assignment Center under Faculty (or your section assignments tab) is where you’ll want to go to get started. This is the central location where faculty, parents, and students will go to interact with all assignments, assessment, and other schoolwork.
For more on this important location as well as the many topics we're about to discuss, have a look at our online help. Now, let’s get to the tricky bits, shall we?
Wait, what’s the difference between creating an Assessment and an Assignment?
Okay, full disclosure, this is likely the big stumbling blocks many educators run into. In here you can create three types of work from assignments, assessments, and graded discussions. Unfortunately, it’s not always clear which option is the one you should pick.
It may come as a surprise but each one has a very specific role to play and the one you think you should use, may not always be the one you need. To alleviate any confusion or potential frustration, lets break it down.
Assignments
On a very basic level, Assignments provide a way for educators to link or upload a document for students to download and work on outside of the product. When they’re done, they’ll submit their work back in the Assignment Center to be graded.
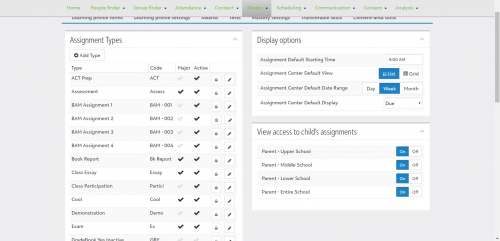
Assignment Types play a key role when creating a new Assignment. Defined Assignment types are necessary for the Gradebook as you can assign specific weights to each one. Through Assignment types, you could create a Test assignment to represent work handed in and graded manually outside of the in-app assessment feature.
Assessments
If you’re looking for a way to create your own test/quiz style assignment with questions built in, you’ll want to select the Assessment option.
Set your work title, the maximum points it’s worth, if you want a time limit on it, as well as how many attempts the student can have. When you’re happy with your general settings (you can swap these later if needed), select Save & Add Questions to start customizing your work.
Better yet, you can set the system to automatically grade it for you once a student submits the work if you enable the option when first creating the work.
The Customization Process
Three tabs are presented to you: Introduction, Questions, and Results.
The Introduction is where you can add a welcome message and perhaps some instructions, hints, or whatever else you want. It’s your text field to do with what you will!
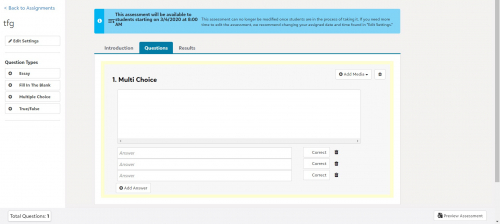
Questions, as expected, is where you can add and customize your questions for the student. Drag a Question Type from the left side to get started. You have four different types available: Essay, Fill in the Blank, Multiple Choice, and True/False. Add as many as you need. The Total Questions counter at the bottom will keep you updated on how big your work is getting.
Finally, the Results tab is where you can set what students will see once they finish. Want them to see how long they took? Total amount of questions and correct answers? Want to hide the results page? You absolutely can. When you’re done, there’s also a preview button to show you what your work looks like.
Whew, today’s post got a bit longer than I anticipated! We’ve only scratched the surface on what you can do inside of the Assignment Center, but I hope this clears up a bit of the mystery between Assignments and Assessments.
That’s going to do it for this week. As always, thanks for stopping by to check out the blog and I’ll see you next time!
News Blackbaud K-12 Solutions™ Blog
03/10/2020 9:00am EDT


Leave a Comment
Besides all that however,anyone should be able to read a blog regardless if they are a member or not to that community. The only thing is, they won't be able to engage with it or make a comment.
Mary Revie
Pusch Ridge Christian Academy
mary.revie@prca.academy