
Adding a Custom Header or Footer to your Altru Receipts
Published
In the past, we’ve seen how to make the most out of the printable space on a ticket. Now, let’s take a look at customizing what prints on the receipts.
In Altru 4.3, we removed the Thank You! from the bottom of the receipt. You could add it back; better yet, you can add custom text to the bottom of the receipt and let your visitors know that they can trade in today’s tickets towards a membership. Let’s take a look at how that is done on the two most common printer manufactures, Epson and Star.
The first thing you have to do is to create the image. Because it is free and easy to use, we can use Paint. Go ahead and open Paint.
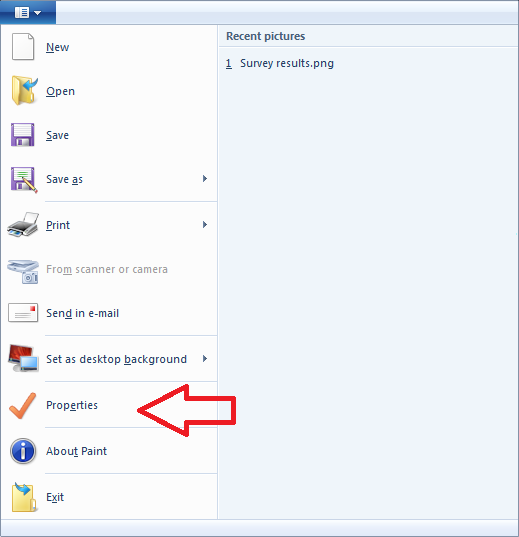
With Paint open on a blank document, let’s change the width of the document to better match the receipt size. To do this, click on the button just to the left of the Home tab. This will display a list of options. We want Properties:
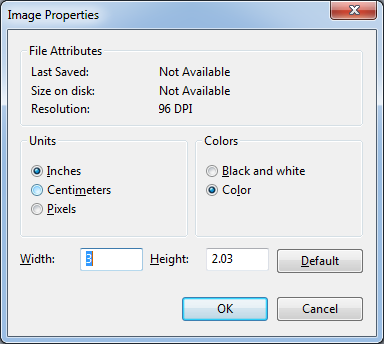
 Change the Units to inches and set the width to 3.
 Next, you are going to add your message by choosing the text option from the Tools area and drawing the text box over the printable area.
 Once you are done adding and styling the message, go ahead and save the file.
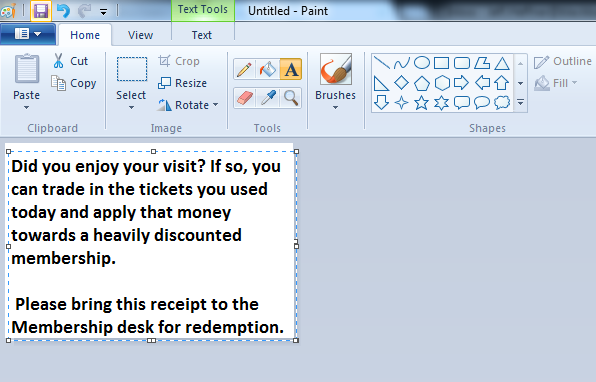 Let’s save it on your desktop so you can find it easily.
Now, all we have to do is tell the printer to use the image:
For Epson:
For Star printers:
But what if you don’t have a Star or Epson printer? This is common functionality. Star and Epson may have particular steps for their printers, but I bet your printer supports customizing receipts as well. You might have to look around in Printing Preferences or Printer Properties to find it.
Let’s see how we did:
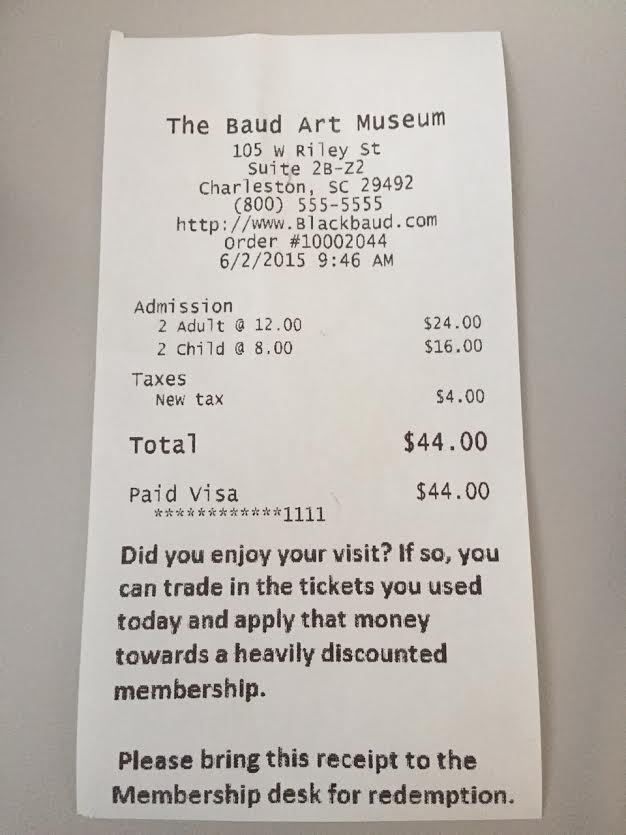 Not bad if I do say so myself. But this is just the beginning.
Don’t like the basic font style we chose in Paint? You can change it. Want to use a picture? You can. It’s up to you. You may have also noticed we only chose to include an image at the bottom of the receipts. You can also customize the tops as well using the same method.
Once you are happy with your image, you can easily add this to all the other receipt printers. Just put the final image some place you can easily access it from the other workstations and repeat steps 3 through 8/9.
My favorite thing about this solution is, it’s available right now and does not require any changes in Altru.
In Altru 4.3, we removed the Thank You! from the bottom of the receipt. You could add it back; better yet, you can add custom text to the bottom of the receipt and let your visitors know that they can trade in today’s tickets towards a membership. Let’s take a look at how that is done on the two most common printer manufactures, Epson and Star.
The first thing you have to do is to create the image. Because it is free and easy to use, we can use Paint. Go ahead and open Paint.
With Paint open on a blank document, let’s change the width of the document to better match the receipt size. To do this, click on the button just to the left of the Home tab. This will display a list of options. We want Properties:
Change the Units to inches and set the width to 3.Next, you are going to add your message by choosing the text option from the Tools area and drawing the text box over the printable area.Once you are done adding and styling the message, go ahead and save the file.Let’s save it on your desktop so you can find it easily.Now, all we have to do is tell the printer to use the image:
For Epson:
- Find the image you created on the desktop, right click and choose Rename. Change it from a .png to .BMP. Hit OK at the warning.
- Go to Printers and Devices.
- Right click on your receipt printer and select Printing Preferences.
- Click on the Document Settings tab.
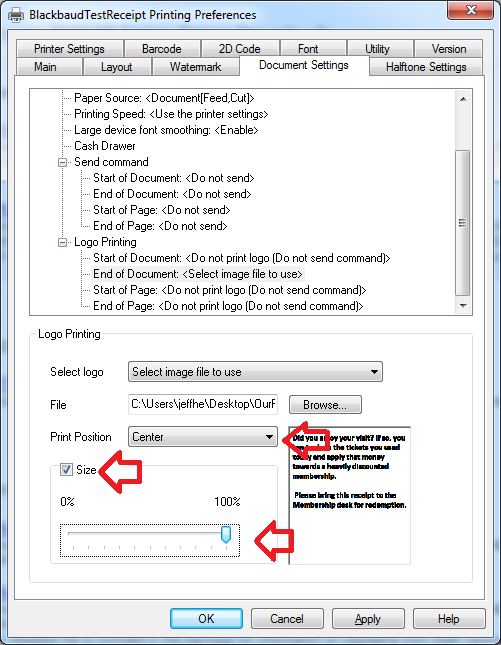
- Scroll down to the Logo printing section and then choose End of Document.
- Change the Select Logo dropdown to Select Image file to use.
- Click the Browse button, change the file type dropdown to look for BMP files and select the image we saved on your desktop.
- Set the print position to Center, and adjust the size to 100% (you can change this later if it is too big.)
- Hit Apply, OK and you are done.
For Star printers:
- Find the image you created on the desktop, right click and choose Rename. Change it from a .png to .BMP. Hit OK at the warning.
- Go to Printers and Devices.
- Right click on your receipt printer and select Printer Properties.
- Click on the TSP100 Configuration tab (it might also be: TSP600, TSP500, etc.) and Launch the utility. When prompted, choose Star line mode (default).
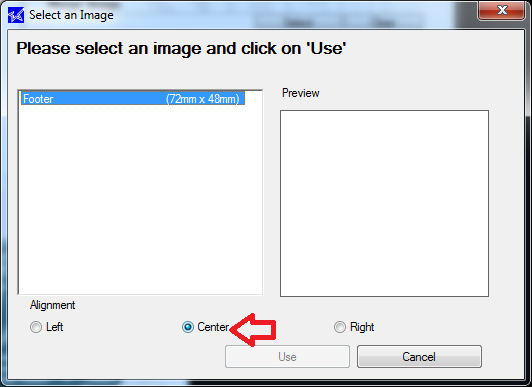
- Click on the image list option on the left and Add your image.
- Click on the Logos & Cropping printing settings on the left.
- Click Add for Bottom Image List and choose the file you just uploaded. Go ahead and click Center.
- Hit Apply Changes and you are done.
But what if you don’t have a Star or Epson printer? This is common functionality. Star and Epson may have particular steps for their printers, but I bet your printer supports customizing receipts as well. You might have to look around in Printing Preferences or Printer Properties to find it.
Let’s see how we did:
Not bad if I do say so myself. But this is just the beginning.Don’t like the basic font style we chose in Paint? You can change it. Want to use a picture? You can. It’s up to you. You may have also noticed we only chose to include an image at the bottom of the receipts. You can also customize the tops as well using the same method.
Once you are happy with your image, you can easily add this to all the other receipt printers. Just put the final image some place you can easily access it from the other workstations and repeat steps 3 through 8/9.
My favorite thing about this solution is, it’s available right now and does not require any changes in Altru.
News
ARCHIVED | Blackbaud Altru® Tips and Tricks
06/10/2015 7:14am EDT
Leave a Comment