Smart Tuition: Setting Up the Integration with onBoard


You can find all the features below under Core > Settings > Smart Tuition.
Let’s Talk About SSO. To make life easier between both platforms, schools can opt to enable single sign-on for this integration. Enabling this feature allows each user to create and use a single user name and password for both Smart Tuition and the “ON” Products.
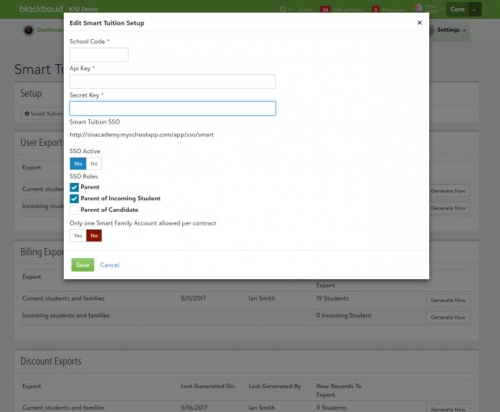
Select Smart Tuition Setup to get started by adding in your School Code, API, and Secret Key, which is provided by the Smart Tuition team. Select the roles that can use SSO and activate the setting.
Before Smart Tuition can be used to manage financial details for families, there are a few things that schools must first do:
Exporting “ON” records with Spreadsheet Enrollment. From Core, four types of exports are available for schools to use, including user data, billing, discount information, and payment details. Select Generate Now to create a comma separated value file (.csv) containing all the needed data, which can then be sent to Smart Tuition directly for processing. Here’s a visual overview of how spreadsheet enrollment works:
 https://www.youtube.com/watch?v=8zav6uDZ1D4
Grade Mapping. If you’re new to this integration, then you’ll need to ensure that the grade values set within your school also match the values kept within Smart Tuition. To prevent the risk of mismatched values, incorrect behavior and errors, we recommend finishing this process before contracts are generated.
Select Grade Mapping and then the school year to get started. Next, match the onBoard values to the Smart Tuition grade values.
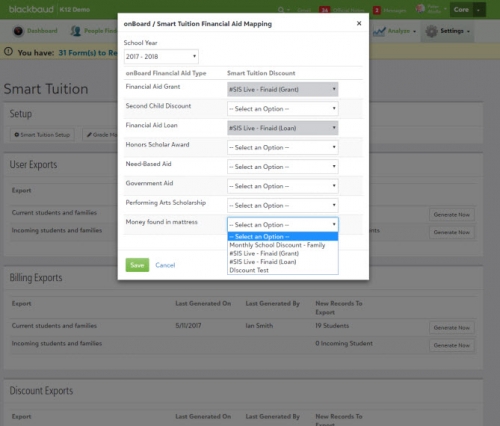
Financial Aid Mapping. The final piece to verify is with the Financial Aid values, ensuring that the types set up in onBoard match Smart Tuition. This process mirrors Grade Mapping and can be started by selecting Financial Aid Mapping.
However, both Financial Aid and Grade Mapping have a couple of extra rules to keep in mind:
- Grades and financial aid types cannot be modified from the mapping screen. These values should be updated first as needed and then mapped once they’re set.
- Any Smart Tuition financial aid or grade mappings that have previously been linked to a contract or fee type in Smart Tuition are locked and don’t allow additional changes.
For more information on setting up Smart Tuition, check out our help. Also, don't forget to subscribe to get all the latest from the K12 group here on the Blackbaud community. Make sure to come back next week for the next part of our look at the Smart Tuition integration: the administrator experience.
As always, thanks for reading!
Comments
-
This is great information, thank you so much!
 0
0
Categories
- All Categories
- 6 Blackbaud Community Help
- 209 bbcon®
- 1.4K Blackbaud Altru®
- 395 Blackbaud Award Management™ and Blackbaud Stewardship Management™
- 1.1K Blackbaud CRM™ and Blackbaud Internet Solutions™
- 15 donorCentrics®
- 359 Blackbaud eTapestry®
- 2.5K Blackbaud Financial Edge NXT®
- 646 Blackbaud Grantmaking™
- 563 Blackbaud Education Management Solutions for Higher Education
- 3.2K Blackbaud Education Management Solutions for K-12 Schools
- 934 Blackbaud Luminate Online® and Blackbaud TeamRaiser®
- 84 JustGiving® from Blackbaud®
- 6.4K Blackbaud Raiser's Edge NXT®
- 3.7K SKY Developer
- 243 ResearchPoint™
- 118 Blackbaud Tuition Management™
- 165 Organizational Best Practices
- 238 The Tap (Just for Fun)
- 33 Blackbaud Community Challenges
- 28 PowerUp Challenges
- 3 (Open) Raiser's Edge NXT PowerUp Challenge: Product Update Briefing
- 3 (Closed) Raiser's Edge NXT PowerUp Challenge: Standard Reports+
- 3 (Closed) Raiser's Edge NXT PowerUp Challenge: Email Marketing
- 3 (Closed) Raiser's Edge NXT PowerUp Challenge: Gift Management
- 4 (Closed) Raiser's Edge NXT PowerUp Challenge: Event Management
- 3 (Closed) Raiser's Edge NXT PowerUp Challenge: Home Page
- 4 (Closed) Raiser's Edge NXT PowerUp Challenge: Standard Reports
- 4 (Closed) Raiser's Edge NXT PowerUp Challenge: Query
- 779 Community News
- 2.9K Jobs Board
- 53 Blackbaud SKY® Reporting Announcements
- 47 Blackbaud CRM Higher Ed Product Advisory Group (HE PAG)
- 19 Blackbaud CRM Product Advisory Group (BBCRM PAG)


